Hollow Knight: Silksong – Bilewater Walkthrough & Guide: Navigating the Murky Depths and Conquering Groal the Great

Bilewater stands as one of the most challenging and unpleasant regions in Hollow Knight: Silksong, a true test of Hornet's resilience and navigation skills. This murky swampland is infamous for its Muckmaggot-infested waters, cunning enemies, and treacherous traps. While exploring Bilewater is optional, mastering its depths is crucial for players aiming to uncover all secrets, rescue lost Fleas, and ultimately reach the game's secret ending. This comprehensive guide will equip you with the knowledge to traverse every nook and cranny, acquire vital items, and overcome the formidable boss guarding its peak.
Preparing for Bilewater: Essential Abilities and Entry Points
Before venturing into Bilewater, ensuring Hornet is well-equipped with specific abilities will significantly ease the journey through its hostile environment.
Recommended Abilities
- Wreath of Purity: This crucial tool, ideally obtained from the Putrified Ducts beforehand, protects Hornet from the detrimental effects of the Muckmaggot-infested waters, which otherwise drain her Silk.
- Traversal Skills: Cling Grip, Clawline, Drifter's Cloak, and especially the Faydown Cloak (double jump) are indispensable for navigating the challenging vertical shafts, thorny passages, and aquatic sections of Bilewater.
Entry Routes
- Primary Entry (Exhaust Organ): The most convenient access point is through the Exhaust Organ, reachable via the Grand Bellway. This path assumes you've previously unlocked the shortcut between Bilewater and the Exhaust Organ, typically covered in earlier walkthrough segments. To reach it, ascend the shaft right of the Ventrica in the Grand Bellway, follow the path back to the Exhaust Organ, exit via the bottom-left, and swim into Bilewater.
- Alternative Entry (Sinner's Road): If the Exhaust Organ shortcut is unavailable, Sinner's Road provides an alternative, albeit longer, entry. Head to the eastern sector of Sinner's Road, near Styx, to find the passage into Bilewater.
Upon entering Bilewater, seek out the Bellway Bench immediately to establish a convenient resting point before deeper exploration.

Exploring Bilewater: Map, Fleas, and Key Discoveries
Bilewater's winding paths and hidden chambers demand careful exploration. Here’s a breakdown of what to expect and where to find critical items and NPCs.
Initial Navigation and Local Wildlife
 The region is teeming with diverse and often dangerous creatures:
- Swamp Squits: Common, often found in water or flying.
- Stilkins: Nasty, sneaky enemies that favor hit-and-run tactics.
- Miremites: Small creatures patrolling platforms.
- Bloatroaches: Large creatures that spew acid left or right when provoked, but are vulnerable from above.
- Slubberlugs: Infantile forms of Muckroaches, they jump from water and latch onto Hornet, proving difficult to kill or dodge.
- Wardenflies: These creatures have a unique interaction; if caught by their globule attack and caged, Hornet is instantly transported to a new region, requiring a fight to escape. It's recommended to avoid this path early on to stay focused on Bilewater.
Acquiring the Bilewater Map from Shakra
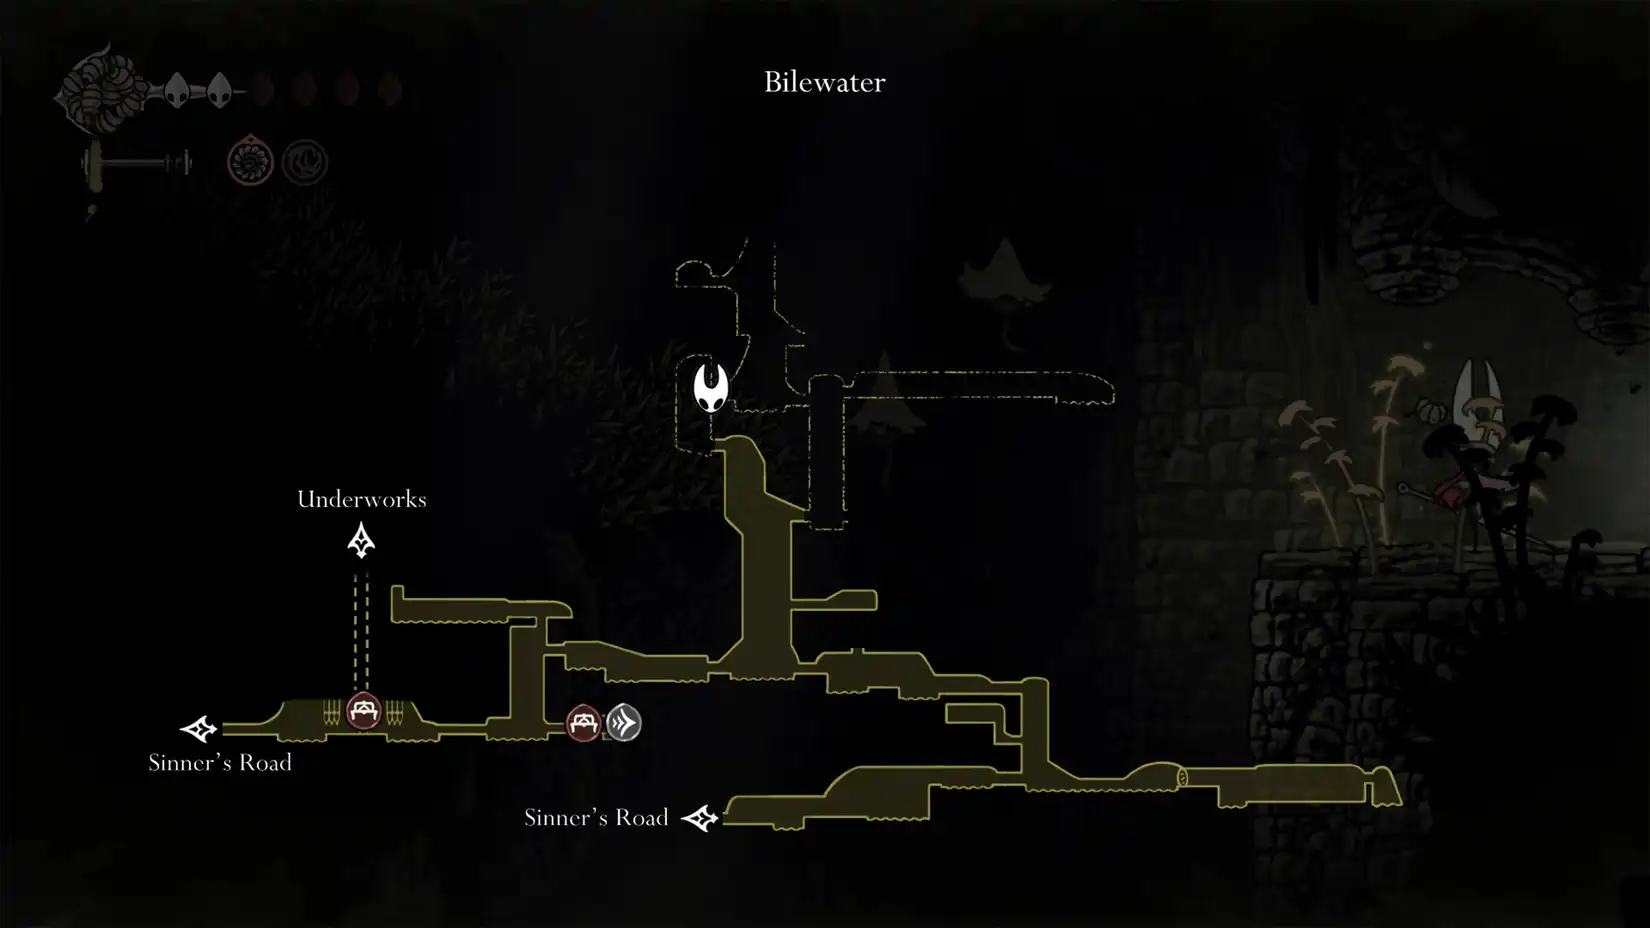
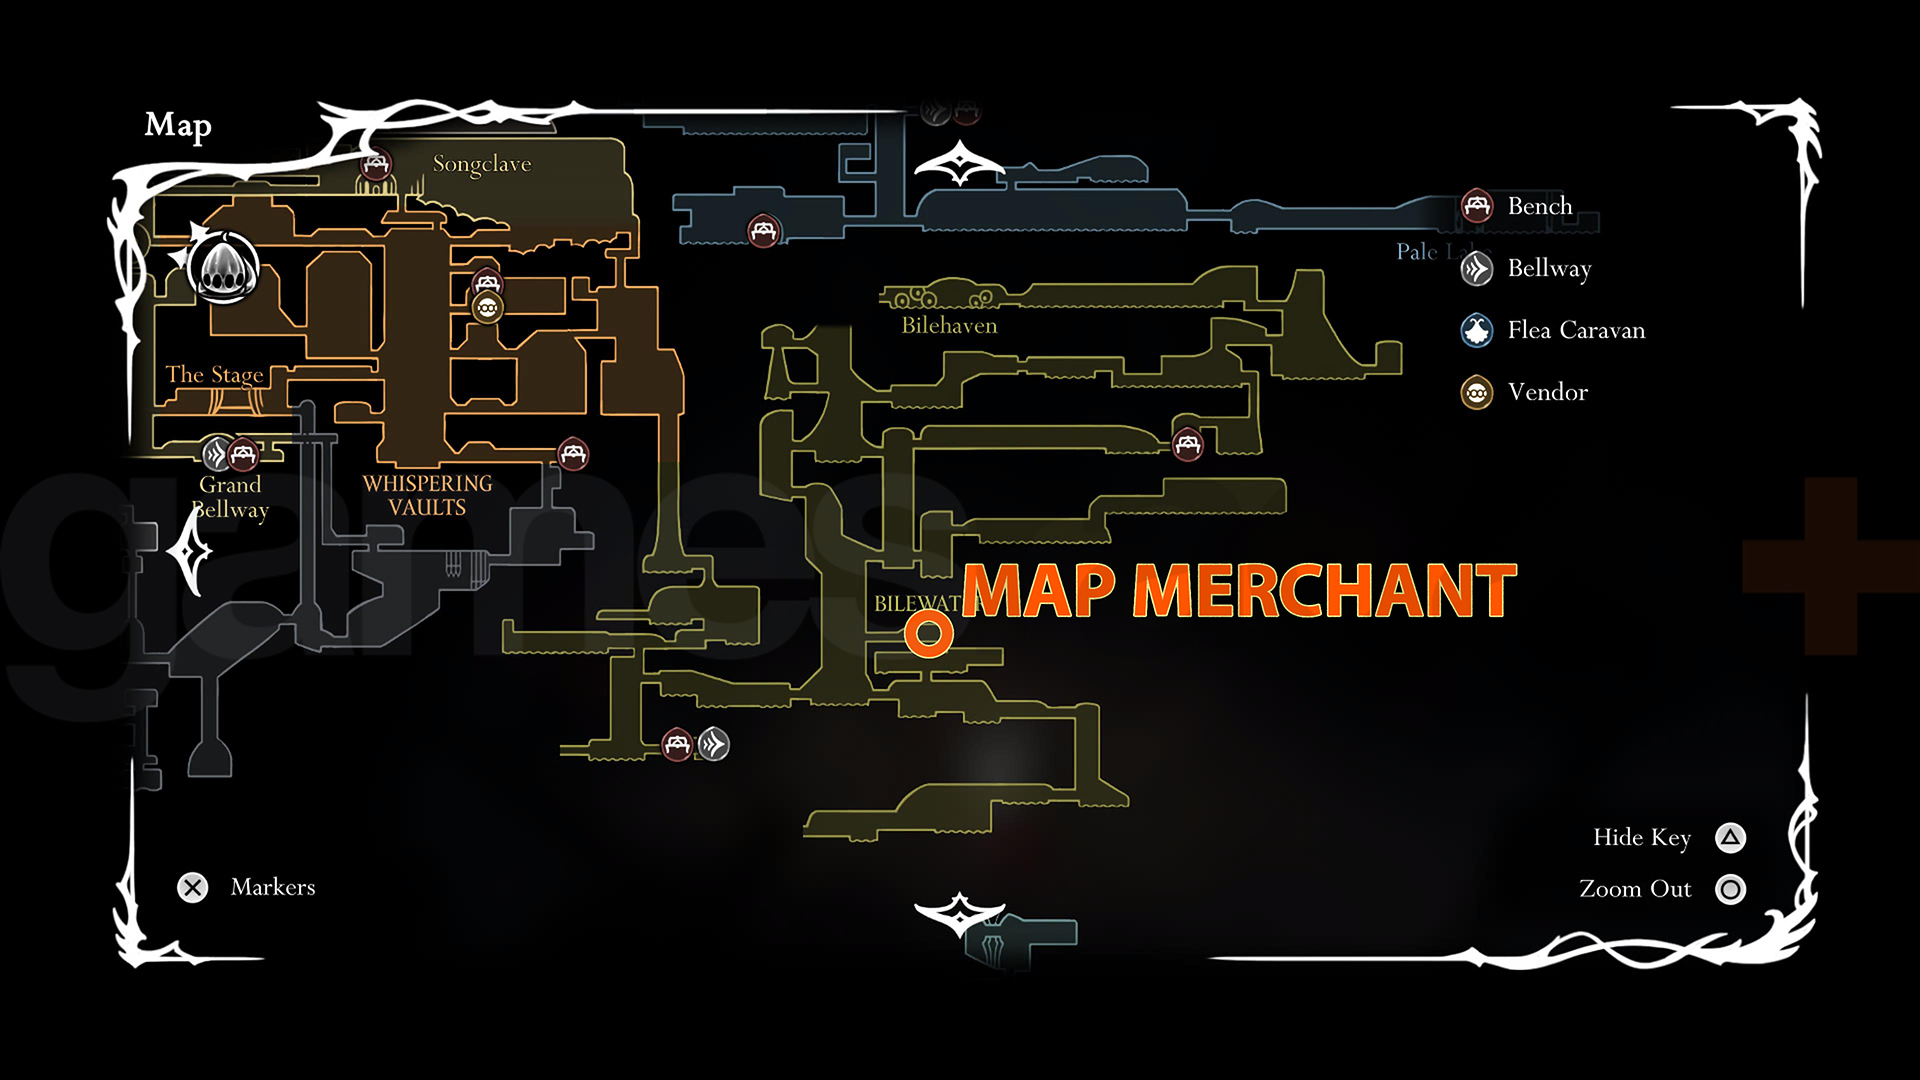 The Bilewater map is indispensable for navigating this confusing region, and it's sold by the ever-humming Shakra.
- Location: Shakra is situated in a small, out-of-the-way chamber roughly halfway through Bilewater. Look for her signature metal rings embedded in the walls, indicating her proximity.
- Requirement: The Faydown Cloak (double jump) is essential to reach Shakra, as her path involves high jumps and clever traversal over spikes.
- Cost: Shakra sells the Bilewater map for 90 Rosaries. Be aware that Bilewater enemies generally do not drop Rosaries, so you may need to farm them in other regions if short on funds.

- Directions: From a specific vertical shaft, use the Faydown Cloak to double-jump, then Clawline over spikes to a platform patrolled by a Miremite. Drop down and Pogo off green swamp balls to scale a wall leading to an eastern exit where Shakra's makeshift tent awaits.
Rescuing Lost Fleas
 Two Lost Fleas are hidden within Bilewater, requiring keen observation and combat readiness.
- First Flea:
- Location: Drop down to a lower ledge in a room after bypassing the Wardenfly path. Slide down the left-hand wall until you find a breakable wall.
- Challenge: Inside, a trapped Flea is guarded by hostile Snitchflies. These foes will pilfer your Rosaries if they land a leap attack, so deal with them quickly. Another Snitchfly spawns behind you upon approach, resulting in a two-on-one fight.
- Second Flea:
- Location: This Flea is found in a secret passageway within a room filled with traps and Stilkins. At the top of the first vertical tunnel, climb the left-hand wall through the ceiling.
- Challenge: Break a rope to spring a trap, immediately diving back down to avoid incoming spikes. Navigate a path with pendulums (jump and dash mid-air to avoid) to reach the Flea.
Important Discoveries and Items
 Bilewater holds several crucial items that aid Hornet in her journey:
- Quick Sling: Located in a secret passageway accessible by attacking the ceiling in a narrow, conjoining shaft. This powerful tool doubles the number of attack tools Hornet throws. Be wary of a subsequent ceiling break that drops spiked balls – a Team Cherry trap!
- Mask Shard: Found at the end of a perilous corridor guarded by Slubberlugs. Traverse quickly through the intense fighting to claim this health upgrade.
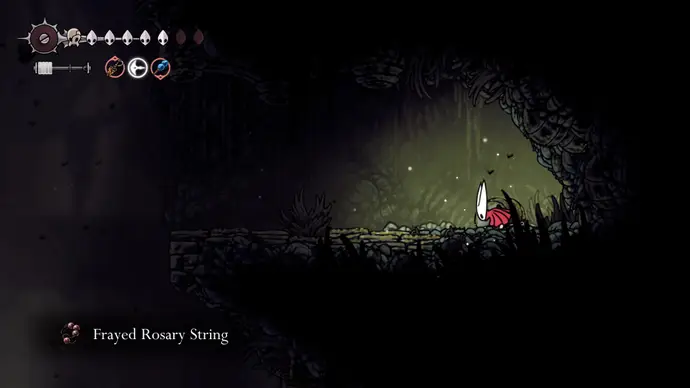
- Frayed Rosary String: Looted from a Pilgrim's body on a ledge in a Bloatroach-patrolled shaft. Mind the falling boulder and acid spew.
- Memory Lockets:
- One is located at the top end of the western passage in the first upper chamber, accessible via floating acid bubbles.
- Another is found in a husk within cocoons, along an eastern cobblestone path interspersed with Muckmaggot-infested water.
- Rosary Cache: Collect this at the very top of a spike-filled room after utilizing your Clawline.
- Twisted Bud: This peculiar item is found through a specific, challenging route originating from the Whispering Vaults. This involves navigating saws, spikes, and breakable walls, showcasing a unique crying animation upon discovery.
Bench Locations
 Beyond the initial Bellway Bench, Bilewater offers additional respite points:
- Trapped Bench: Located at the top of a Bloatroach-patrolled shaft. This bench is a deliberate trap, causing Hornet to fall into worm-water below. While unavoidable, there’s an easy exit by swimming right.
- Secret Bench: From a specific right-most platform, drop into worm-water, attack a wall to your right, and follow the path to a room below. Swim left and break another wall to reveal a well-positioned bench. This hidden gem offers a safe refuge and provides immediate access to a Memory Locket found in an adjacent corridor.
Conquering Groal the Great: Boss Guide and Strategy
Groal the Great is the formidable boss of Bilewater, known for its brutal arena fight preceded by a challenging gauntlet of enemies, making the runback particularly punishing if you fail.
Reaching the Arena
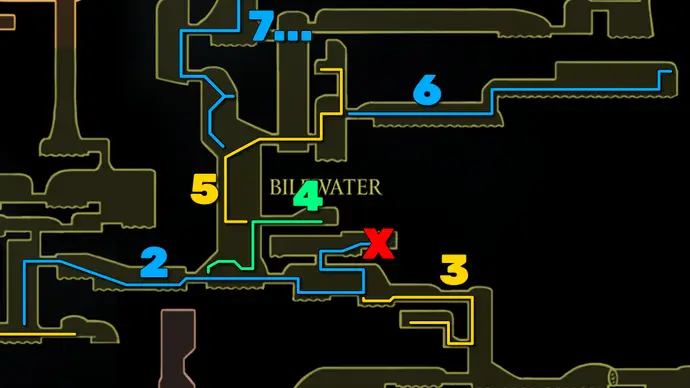
- Directions: Start from the northeastern bench. Ascend to the level above, proceed east through a large room (utilizing floating acid bubbles and Swamp Squits for traversal), then make your way west across a treacherous hall filled with booby traps and hostiles over Muckmaggot-infested waters.
- Runback Shortcut: An easily missable bench significantly cuts the runback time. When you reach the 'elbow area' on the level below Groal, head right instead of immediately going up. Drop into a pool of maggots, break the wall to the right, then follow a straightforward, enemy-free path. Break a final wall to the left to reach the hidden bench.
- Soul Regeneration: Look for hidden flowers in a secret segment at the top of the area just before the arena to replenish your Soul.
The Gauntlet Before Groal
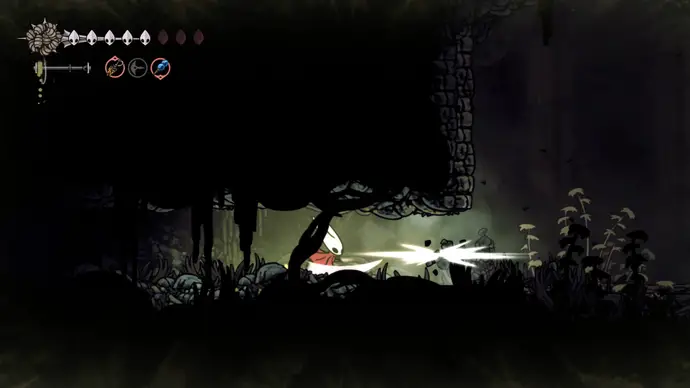 Before facing Groal, you must survive five waves of enemies in the arena:
- Wave 1 (2x Stilkin): Stack them by staying on the right-most platform and use Pogo Jumps as they surface.
- Wave 2 (2x Stilkin Trapper): Avoid their pin attacks by staying on top with Pogo Jumps. After this wave, a Spike Ball descends; hug a corner to avoid damage.
- Wave 3 (3x Swamp Squit): Avoid corners as these enemies explode upon defeat.
- Wave 4 (1x Stilkin + 1x Stilkin Trapper): Position on the left platform to quickly eliminate the Stilkin Trapper while the Stilkin is out of range. Another Spike Ball will descend; hug a corner.
- Wave 5 (2x Swamp Squit + 1x Stilkin Trapper): Pogo Jump off the nearest Swamp Squit to reach and immediately eliminate the Stilkin Trapper.
Groal the Great: Attack Patterns & Counters
 Groal combines various attacks, often accompanied by environmental hazards. Quick movement and precise timing are key.
- Acid Balls (Poison Spit): Groal spits explosive acid orbs. Maintain a safe distance and hit them back, or use Pogo Jumps for damage when Groal is vulnerable.
- Dive and Surface: Groal dives into the water and resurfaces near Hornet. This momentary respite is ideal for healing or setting up abilities.
- Vacuum Suck: Groal attempts to pull Hornet into its mouth.
- Counter: Interrupt with Voltvessels for damage. Alternatively, use a combination of dash and Clawline to avoid. If swallowed, repeatedly attack to escape and heal (especially effective with the Multibinder tool, which heals four masks).
- Soul Projectiles: Groal's eyes glow white, and it spits three white Silk projectiles. Utilize wall jumps for enhanced movement control and to create openings for counter-attacks.
- Summon Minions/Spike Ball: After diving, Groal may randomly summon two allies and/or swing the spike ball from the ceiling. Observe for crumbling roofs (spike ball only) or fountains (enemy summons). Wait on a side platform, then Pogo jump on enemies to gain Silk and avoid the spike ball.
Recommended Loadouts
Optimizing your Silk Skills, Tools, and Crests can significantly influence the fight's outcome.
- Silk Skills: Silk Spear is a solid choice for consistent damage.
- Tools:
- Voltvessels: Highly recommended for interrupting Vacuum Suck and electrifying the water, damaging enemies.
- Cogfly: Useful for dealing with spawned minions. Can be enhanced with Pollip Pouch to inflict poison damage.
- Crests:
- Reaper Crest: Best for consistent Pogo Jumps and a balanced tool mix.
- Witch Crest: Offers faster attack speed and greater range, sacrificing a Yellow Tool slot for an additional Blue Tool.
- Architect Crest: Maximizes tool value with an additional Red Tool slot, allowing on-the-spot tool crafting – particularly useful for Voltvessels or Pimpillos.
- Optional Enhancements:
- Injector Band: Essential for maximizing damage during Groal's brief openings.
- Druid's Eye: Builds Soul passively, useful for enduring the gauntlet.
- Magnetite Dice: Provides a rare chance to negate incoming damage.
General Strategy Tips
- Pogo Jumps: Consistent use of Pogo Jumps is invaluable for staying airborne, avoiding attacks, and dealing damage.
- Water Usage: The infested waters drain Silk but do not deplete masks. Staying in the water can prevent Groal's Vacuum Suck and block most projectiles, but limits your Silk usage.
- Quick Movement: Utilize Clawline to quickly traverse the arena from sides to center and vice versa.
- Healing Opportunities: The Dive and Surface attack offers a prime moment to heal safely due to its duration.
Post-Victory: Rewards and Next Steps
Defeating Groal the Great marks a significant achievement in Hollow Knight: Silksong, unlocking crucial areas and items.
Unlocking Bilehaven and the Seeker's Soul
- Upon Groal's defeat, a bench appears in the arena, and the left-hand door opens, granting access to Bilehaven.
- Inside Bilehaven, you'll find the Seeker's Soul, an item vital for accessing Act 3 of Silksong.
The Huntress and Apostate's Key
- Apostate's Key: After exiting Bilehaven and destroying a rope shortcut, climb to the upper level of the next room. Navigate past dangerous Garnak tongues and Ductsuckers to loot the Apostate's Key, which unlocks a forthcoming region.
- The Huntress: Drop down from the Apostate Key platform, head right, and enter a building to meet the Huntress and accept her Broodfeast quest. A breakable wall to the right offers a shortcut back to the room's start.
Activating Shortcuts
- Destroy a rope on the left of Bilehaven to open a shortcut to earlier parts of Bilewater.
- Destroy a second rope in the room above Bilehaven to unlock a closed-off area of the Putrified Ducts, preparing for future exploration.
Congratulations, you have successfully navigated and conquered Bilewater! Return safely to the Bilewater Bellway, rest, and prepare for your next adventure in Hollow Knight: Silksong, where the Apostate's Key will undoubtedly lead you to new challenges and discoveries.